Since the last post we have taken out the IRS, suspension and wheels and prop shaft. We've got the car on the rolling jig and have the rollover jig set up too. Today we evaluated the whole body and discovered a few new places of rust and a lot of brasing (lol) on one of the wing panels and there is evidence to show that the car has had a bump on the rear offside and the owner has replaced the rear wing.
Panels we need to replace are: inner and outer cills both sides, stiffeners, boot floor, half of the floor and transmission tunnel and some other small minor places. The body minus the bonnet is being sent off for sand blasting soon and all of the parts are stored away. This coming week I intend to get going on the IRS and restoring what I can whilst we order new brake discs, coils and possibly shocks depending on the condition of these. Not entirely sure what else needs replacing on the IRS until we have a proper look at it.
I had some trouble today taking the horn push off the steering wheel and accidently broke some of the plastic holding the mechanism in place which we need to find a way of fixing cos they are pretty hard to come by.
As soon as the body comes back from the sand blaster we intend to take it straight to my dads friends garage to begin welding new panels on and taking the body back to its former glory. In the mean time I suspect we will be working on the mechanical parts because thats what I'm really interested in.
I'll sort some pictures tomorrow after I get home from work (found out that the lead for the camera is the same lead for my girlfriends external HDD)
Saturday, 19 April 2014
Sunday, 13 April 2014
Pictures!
Sorry about the wait for these pictures (a video further down too)
Hopefully for the next lot of pictures I won't have to be waiting a week or so for them but we have cracked on even more and are continuing to restore parts we've taken off piece by piece
Enjoy!
Hood:


Rip in the original hood unfortunately

Wood holding it to the bodywork!

Interior panels around the hood


Mouldy rubber


Butler chromes in one piece (difficult to get hold of)

Boot floor before we took the fuel tank out

Rusty

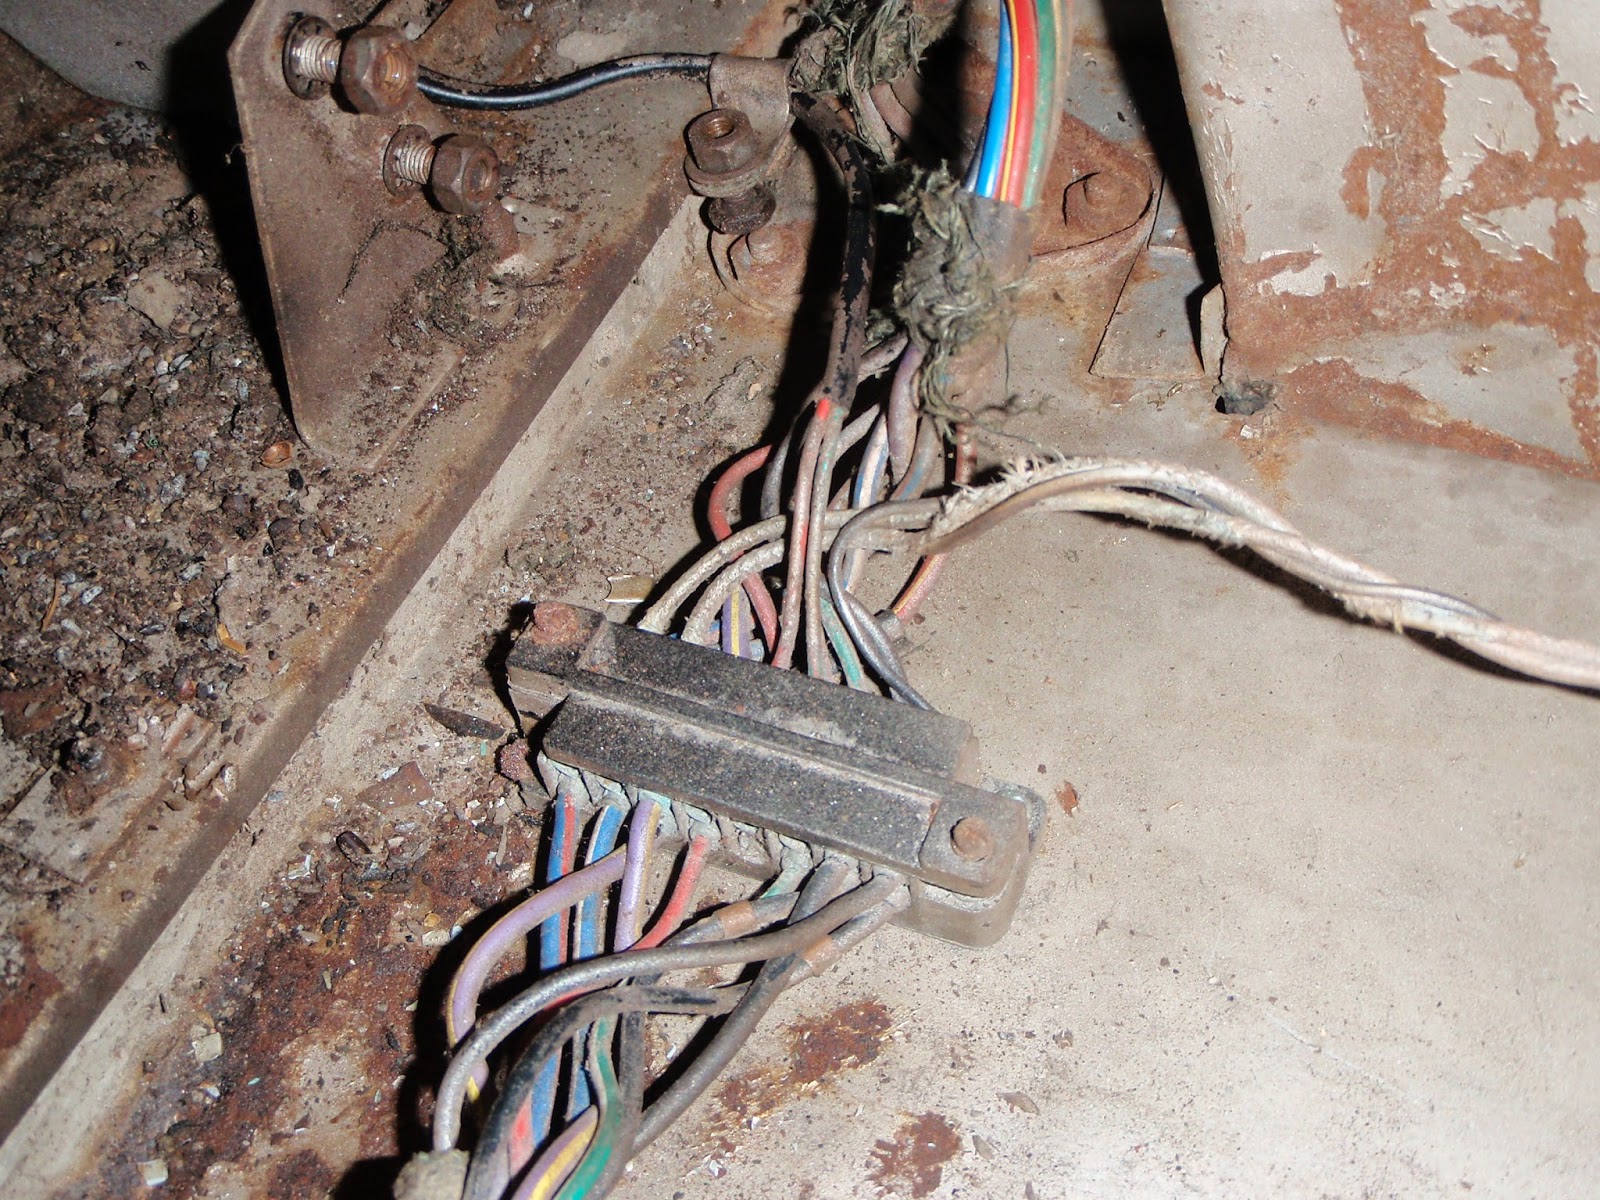
Wires


Interior strip: complete (minus the dash)


Some parts of the engine taken off to allow us to take the engine out


Carbs off


Interior before hand!


Centre console was an absolute bitch to get out


Bulkhead rust

Where the pedal box will be going back in :)

Where the pedal box is now!

Steering column


Wednesday, 9 April 2014
Still no pictures but a lot of progress
Had a look for the camera but I can't find it anywhere, been quite busy over the past few days. We've now taken out the fuel tank, bootlid and hinges, windscreen, pedal box, steering rack, steering column, carbs & air inlet, seats, centre console, and a few other things.
Every piece of chrome is now off the car and ready to go for rechroming and we have a fair few pieces ready to go for powder coating and a couple of buckets of nuts & bolts for zinc plating.
Bad news is that one of the main pipes on the engine frame is rusted through which we only found out when the carbs came off which means we need to replace the whole frame (for alignment of the chassis purposes)
Good news is that we only need to replace half of the boot floor as there was no rust under the fuel tank thankfully.
The plan over the next couple weeks is to crack on with restoring what we have taken off the car so far because the number of boxes has grown exponentially and we are going to forget what goes where if we don't sort them out. Doing a stock take tomorrow and deciding what new parts we need to order and what can be refurbished.
Once my dad finds the camera I'll be uploading a hell of a lot of pictures of progress.
Thursday, 3 April 2014
Update
Since the last update we have been quite busy cleaning up all the parts we have taken off so far (things like seatbelt anchor points and bonnet hinges etc) which has been a lengthy but extremely fun process trying to preserve as much as possible of the original car. Once we cleaned up everything (i'll get some pics of the boxes we currently have of parts we've taken off) we began taking off the hood making sure to take lots of pictures of the staples in the wood and where the hood fits to the frame mechanism. We've also taken off the air inlet and mudguards to be resprayed/replaced. I also took out the centre console which was a bit of a pain because two of the seatbelt anchors keep the console in place and after some fiddling around with different ways of getting leverage I managed to get both the anchors out and the centre console slid off. We've also removed all the foam/upholstry behind the seats and all of the carpet. Next job is removing the seats. We have a sneaking suspicion that all of the bolts holding the runners to the floor are rusted through so that's gonna take a bit of thinking of how to approach it. The aim this weekend is to get the engine running, then once we know that we can take the whole of the engine bay out of the car, take out the prop shaft and IRS and the last couple pieces of the interior then we can send the main body off to be sandblasted and primed which will give us more space to work on the IRS and clean up the engine/suspension/steering/brakes etc. We have decided to use Hutsons to weld up all of the shut lines and lead any dents on the car because of the car being chassis No 12 we want everything to do with bodywork to be absolutely perfect. They will also prime the car and undercoat it.
I'll update tomorrow with more pictures of the build so far.
Tuesday, 1 April 2014
Bonnet in pictures
Since my last post we haven't taken anything else off the car. We are currently preparing items to send to the zinc platers and chrome platers. The bonnet spring mechanism is proving to be a pain as they are quite rusty in some areas but I'll hopefully finish them off today. We've also restored the horns and repainted them (gloss black as original). Today I'm planning to put the final coat on the horns, finish off the bonnet spring mechanisms and clean up the anchor points for the seats and other misc pieces off the bonnet and finally label up everything correctly as my OCD is beginning to take over (and I don't want a year to pass and not know what bit goes where)
Here are the pictures of the bonnet I promised you. Turns out my dad's camera had ran out of battery so I currently have no pictures of the two doorcards, mechanisms and glass. I'll take some today and write another update later this evening.
The Mileage


The car before we took the bonnet off.

Chassis No12. of the 4.2 - Possibly so early Jaguar hadn't even put the 4.2 E-type on the bootlid yet

The majority of rust which we can see is in the boot floor. Could be more underneath the petrol tank too


The bonnet came off! First job was taking off the chrome which proved a little difficult as we had to take off the lights, and glass to get to one of the bolts! We've put the Light cover glass and chromes in a very safe place as it's like £250 just for the pair of headlamp chrome.

Hardly any rust underneath the bonnet


Prime example of minimal rust


Wiring
The saturday was a really nice day so we got everything out in the garden (plus better light to work with)

Starting to come apart

An example of a reference picture for reassembly

Another angle, you can see my mums F-type V6 sneaking into this picture


Final pictures of the "exploded view" for reference of reassembly


Subscribe to:
Posts (Atom)